free copyright

MyFreeCopyright.com Registered & Protected

Friday, August 28, 2009

Saturday's Market

Hey one and all....Been watching the weather...If it's raining at 7am when it's time for me to leave, I am going to wait untill it stops raining. If it is going to rain all day I will probally not go, so watch the skies, if it's pouring and quits by 9am I will be there, it it continues after 9/10 it don't  pay to take 2+ hours to set up just to break down in 2/3 hours after I get there. SO all of you who have completed the challenges on this and Shelly's blog you will still get your freebies next wednesday. So stay dry, and keep warm see ya soon!!!!!

Template day....

So after giving the ATC's as an altered project I thought it was only fitting to give the ATC envie as the free file...I podted it here, but you can also find it here. This is one of my favorite places on the world wide web..Tone of inspiration and talents people....SO scout arounf on there and see the amazing things they have to offer..To resize it print abd scan then adjust in scan process...
Funky Folder Template
This very hip and stylish folder has flaps that fold over each other to encase stamped images, cards, invitations, photos, gift cards, or whatever your heart desires. Optional slits can be cut to create a closure or add a closure of your own, such as a string and button embellishment.
See the stunning results of this 'Tempting Template' challenge in the June/ July 2006 issue of The Stampers' Sampler.
                                   
                                             Folder template submitted by Paula Huiras from New Ulm, MN.
 
1. Trace template onto card card stock.
2. Cut along the solid lines and score along the dashed lines, as shown.
3. Stamp, color and embellish folder as desired
4. Cut optional slits for closure or attach closure elements to rounded flaps.
5. Optional: Create card or inserts to be placed inside folder.
6. Fold along the scored lines to close the folder.

Thursday, August 27, 2009

altered arts/book,ATC/ACEO's + goodie

As some of you know I am in love with altered arts, mixed media, collage work and all forms of mail art..Atc's have a special place in my heart, so here is everything you ever wanted to know about an ATC.......

The very basics
As their name indicates, ATC are collectables, a brilliant idea born of the older sports-themed trading cards. The one rule that makes an ATC derives from their origins: the dimensions of the ATC must be 2.5"x3.5", or 64x89mm.
To this rule are appended a couple of conventions. First, an ATC mustn't be sold, only exchanged, as the whole essence of these tiny works of art is about artists meeting (by correspondence or online if need be) and exchanging their works, thus meeting many artists and getting exposed to many personal styles. Second, on the back of each ATC the artist writes part or all of the following information: name, contact information, title of the ATC and number (1/8, 2/8...) if it's part of an edition. By definition ATCs are made in limited numbers, often no more than one of a kind. Unique ATCs are called originals; sets of identical ATCs are called editions and are numbered; sets of ATCs that are based on one theme but that are different are called series. Don't be intimidated by the concept of small editions or originals: very few people are anal about this. What most collectors really want are cards that were made with care. Based on that, numbers are meaningless.
That's all! The above is all you need to know to start making your own ATCs. Common sense dictates that they should be sturdy enough to survive mailing, and of reasonable thickness (unless you specifically want them otherwise. Transparent card sleeves are useful to protect the cards if need be. This is particularly true if they can easily get smudged or if the medium might stick during transport


They can be scrapped, stamped, painted, colored, drawn, done in mixed media, there are no rules....SO anyone who makes an ATC and brings it to the market Saturday will get an extra surprise

So come on have a little fun and step outside the box. Once you try this you will become addicted just like the rest of us.....
Not only is this link one of my favorite places to shop for altered art and ATC supplies but they have a beautiful gallery, as does this gallery..so enjoy the eye candy
Keep in mind ladies this is not my work, it is just here for inspiration, but you can find the link to this awesome site in the post, (link here) These talented artists are just here for our inspiration. And if you visit their sites you see what i mean, so enjoy all their efforts and amazing talents. 

Wednesday, August 26, 2009

This weeks challenge( #2)

Hello crafty ones....Hope you are all enjoying your week...Today is market day and I will be there if anyone wants to stop by and say hi...
This weeks challenge is going to be a color challenge...Those of you with the Bristol water color paper know what I mean...So using the watercolor paper, and your water color pencils or crayons, with your aqua painter, or splender blender, oe even your blender pen and your favorite stamp set,  with your 3 favorite paper colors, create a card, or post card, or even an ATC, and bring it to the Saturday market to get your next freebie. So if you have never tried water coloring, be brave, and give it a go.....It's actually a lot of un to do...And don't forget the fun word this week....(doodle do)..what I spend most of my time doing...lol....:0)

Tuesday, August 25, 2009

Technique Tuesday, water-coloring...

Watercoloring with Markers

by Julie Buhler
Create beautiful watercoloring with water based markers and an Aquapainter™.

Supplies

  • Water based markers
  • Aquapainter™ or watercolor brush
  • Line art stamp
  • Stazon™ or other waterproof ink
  • Watercolor paper (140 lb cold press is best)

Step-by-Step

  1. Step 1

    Stamp image with Stazon on watercolor paper. We've found that on paper lighter than 140 lb, the colors to not blend properly.
    Start coloring with lightest colored marker first, leaving some lighter areas. It is easier to add more later than to try to take color away.


  2. Step 2

    Blend the ink with an Aquapainter. Make sure to leave some areas with less ink.

  3. Step 3

    Now add a darker color where shadows would naturally be. Pay close attention to lines, creases, and underneath things.

  4. Step 4

    Blend the two shades with the Aquapainter.
  5. Step 5

    Move on to another section of the stamped design and repeat Steps 1 - 4, making sure to put the darker color on the shadow lines.

  6. Step 6

    If during blending, you find there is too much color, it can be removed.

    In this picture, the color under the Aquapainter is being removed.

  7. Step 7

    After lifting color from the image, rub the excess off between your fingers or on a paper towel.
    This is also helpful when there is too much water built up in the bristles of the brush.

  8. Step 8

    Some areas were purposely left white for highlights and dimension. A white gel pen accents her cheeks to draw the eye and create more dimension.

  9. Step 9

    Embellish as desired.

This gal is amazingly talented, I love her work!

Saturday, August 22, 2009

This weeks challenge

Hey ladies, another great Saturday as so many of you have showed up braving the crappy weather. This weeks color challenge was orange, blue and green. SO those of you have made cards with the color scheme all did great, as I get the photos I will post them here, so the first 2 cards belong to Judy and Jean, and the cards are stunning....Heres a look at them..... as soon as I have the time I will upload mine and post the nest challenge...Great job ladies!!!

Friday, August 21, 2009

Look who we have......Its Ms Sylvia, and Ms Tina

Hello Ladies, I know Judy and Jean, will be very happy to see that a friend from UKScrappers has started her own blog, and and I am thrilled she has done this.. You card makers are going to LOVE her amazing talents...Sylvia is a talented Craft Robo designer. She designs the most amazing card fronts that you will ever see..So pop on over to Sylvia's blog and see her amazing work. I am honored to make her designs, and I know you ladies will love them as much as I do...SO go peek at Sylvia's work and be prepared to to see some amazing eye candy and drool a bit, here's the link. Sylvia you RoCk!! and let us not forhet the queen of the robo and the pride of the U.K. Ms Tina you can find her here

Thursday, August 20, 2009

Alter this....101

I am very fortunate to be blessed with family, friends, and to be surrounded by the many talented people I gain inspiration from, knowledge from, and truly just enjoy talking to. I have many friends all over the web and consider that a priveledge. Most of my altering inspiration and and general info on this subject is from some very dear people, David and his wife Maria, they are the owners and authors of http://www.altered-art.net/ 
I hope you all love their site as much as I do..SO go check them out and leave them a nice big Wisconsin hello. Have a great day Crafty ones....
Hugs,
Ronnie
http://www.altered-art.net/

Wednesday's something new


SO today is is a day to learn about something new, and since everyone is at different levels of paper crafts, I thought...ok how about an ATC ( artist trading card) these lil beauties are amazing, quick and easy to make, and oh so much fun to do.. SO here is everything you ever wanted to know about making ATC's.... *************************************************************************************
The very basics

As their name indicates, ATC are collectables, a brilliant idea born of the older sports-themed trading cards. The one rule that makes an ATC derives from their origins: the dimensions of the ATC must be 2.5"x3.5", or 64x89mm.

To this rule are appended a couple of conventions. First, an ATC mustn't be sold, only exchanged, as the whole essence of these tiny works of art is about artists meeting (by correspondence or online if need be) and exchanging their works, thus meeting many artists and getting exposed to many personal styles. Second, on the back of each ATC the artist writes part or all of the following information: name, contact information, title of the ATC and number (1/8, 2/8...) if it's part of an edition. By definition ATCs are made in limited numbers, often no more than one of a kind. Unique ATCs are called originals; sets of identical ATCs are called editions and are numbered; sets of ATCs that are based on one theme but that are different are called series. Don't be intimidated by the concept of small editions or originals: very few people are anal about this. What most collectors really want are cards that were made with care. Based on that, numbers are meaningless.

That's all! The above is all you need to know to start making your own ATCs. Common sense dictates that they should be sturdy enough to survive mailing, and of reasonable thickness (unless you specifically want them otherwise. Transparent card sleeves are useful to protect the cards if need be. This is particularly true if they can easily get smudged or if the medium might stick during transport.

*************************************************************************************

-> What to do with your collection: A popular solution are those nifty albums with 9-pocket sheets available for commercial cards. But many people also keep them in boxes so that they can enjoy taking them out and handling them as they flip through. Others collect them in panels or picture frames to display in their home. I've heard of people sewing a plastic pocket to their handbags to display a different card every week, and someone placing a card inside their name tag, turning it into a piece of unusual jewelry. Some even make special handmade books to display theirs. The sky's the limit...

*************************************************************************************

-> Signature cards: Many ATC artists create a "business card" ATC that features a self-portrait on the front and a fact sheet about themselves on the back. They then send it out with sets they are trading. This is a lovely idea that allows artists to get to know each other more. Make it good -- this is your image in the ATC-trading world!

-> Design issues to consider: My personal piece of advice before you start would be: as you sit down to create your own cards, don't think of them as works of art scaled down. Many stamp designers make this mistake when they create stamps for the postal office. Think at the scale of the card, don't go into techniques that are only suitable for larger projects, but on the contrary think of what the small size allows you to do that wouldn't be otherwise possible. You know how a group picture becomes so uninteresting when scaled down too much, because you can't even see faces anymore? This is an example of a subject that would be wasted on a small siz


e.

Tuesday, August 18, 2009

Technique Tuesdays.....Serendipity's

So at the Market on Saturday Judy Beth and Jean were asking about the huge amounts of scrap paper one collects, and as you all know, it can become overwhelming piles of scrap paper. So instead of throwing them out, why not put them to good use..Make Serendipity squares and inchies...Today we will talk about the Serendipity squares, and save the inchies for another time...
Serendipity Squares are ‘all the rage’ in the scrapbook world these days, and no wonder! These little squares are both beautiful and fool-proof! There is absolutely no ‘wrong’ way to make them! So unique, each one is different and easily personalized for any theme or color scheme. While these may seem a little intimidating, they are really very easy to make.

Step 1
Choices, Choices!

Choose a piece of cardstock for your background. I generally like dark colors for the background, but whatever fits your theme is fine.

Choose coordinating papers – patterned papers, mulberry, homemade, textured, vellum, metallic, velvet, etc. This is your chance to dig into that file of scraps and use them up! Distressing some of the papers gives an interesting texture to the collage.

This is a terrific technique for using your bordered and patterned paper stash.


Step 2
Tear Into it!

Cut and/or tear coordinating papers into strips and odd shapes. Got decorative scissors collecting dust? Consider using them to cut some strips for your collage!

Glue each to the background paper in random order. Be sure to get good adhesive coverage. You do not want any part of the coordinating papers to be loose from the page – this will cause problems in the cutting stage. I use glue sticks or Xyron adhesive for this step.

Be sure to place some shapes over the edges of the background paper. You can trim it off later. Don’t worry about the design of the page at this point – it will look very cluttered. When you cut these up into squares or shapes, each one becomes a little thing of beauty.


Step 3
Go Wild!

This is the fun step – let your imagination run wild! Your collage sheet is ready to be embellished.

In random order, embellish the sheet with one or a combination of the following:

* stickers
* skeletonized leaves
* versamarker and embossing powder (I think metallic EPs look terrific on these)
* stamps (if using pigment ink, be sure to emboss the designs)
* glitter
* paper punchies
* dried leaves and flowers
* spangles
* ribbon
* Magic mesh
* mulberry spring rolls
* alphabet stamps (old fashioned alphabets work great for this)
* paint dabs
* metallic or glitter gel pens/ markers
* Pearl-Ex
* metallic rub-ons
* foils, gold leafing
* ink sponged or daubed in haphazard spots

Don’t worry too much about balance, but do leave some background space showing and try to make sure that each portion of the page is embellished.

For this page, I chose several leaf stamps (Stampin’ Up) gold pigment ink and several different embossing powders (some sparkly).

*Please note that if you plan to emboss your images, you will first need to clear emboss the entire sheet. This is to catch ‘stray’ glue and seal it. Otherwise, you will get messy results with your colored embossing powder.

I randomly stamped the page with the leaves, sprinkled with various embossing powders and heated them with an embossing gun.


Step 4
Cuttin’ Up!

When your adhesive is completely dry and all embossing powder is completely melted, you are ready to cut your page into the desired shape:

For squares:
A good rotary trimmer makes this step a breeze. I use one by Carl but have also had good results with a glass mat, a very sharp craft knife and cork-backed metal ruler.

Decide how large you would like your squares and cut the page (very carefully) into strips. Trim into squares. Be sure to make the squares even and straight as it will be important when they are mounted.

At this point, you may want to look at each square and add bits to squares that are plain or just look like they ‘need’ something. Charms, buttons, nailheads and brads can be added at this point. Crystal Lacquer can be painted on the tops of squares to seal them, if desired.

For other shapes:
Don’t limit yourself to cutting these into squares! Why not try one of the following ideas?

- Using jumbo punches to punch out shapes (hearts, stars, ovals, flowers
- Using a letter template to cut title letters
- Cutting long strips for borders or weaving
- Cutting the collage into large rectangles for photo mats
- Cut circles, squares or ovals and connect them to make a chain
- Cut tags from the collage (or embellish tags with squares, shapes)
- Use the Sizzix machine (or other die cut machine) to cut letters or shapes from the collage page


Card maker Mondays....

Hey crafty ones.....If one was to ask me what my favorite paper craft was I would have to answer happily "All Of Them" It's a curse I think we all bear. I love scrapping, stamping, card making, altered arts, mixed media, and anything else to do with paper. I am probably like most crafters in that I like to switch it up..Sometimes I get an idea and can not rest until I complete it. As far as cards go, I love the traditional stamping, and the paper piecings of cards, and the collaged cards, then there are the pop-ups, and the the 3-d .gsd cards, which are amazing..So depending on what I have going on in my lil ol mind determines what type of card I end up with.. So with that in mind here are a few sample cards, as again I could not make up my mind...lol
So here are a few cards I started, with several different techniques, and will feature them on Technique Tuesday

So this first card was cut on my Silhouette cutter, the file was designed by a very talented lady over at ukscrappers, you can find her store and designs here she is very talented and gifted designer. Some day I hope to be half as good as the gals from UKscrappers. They rock


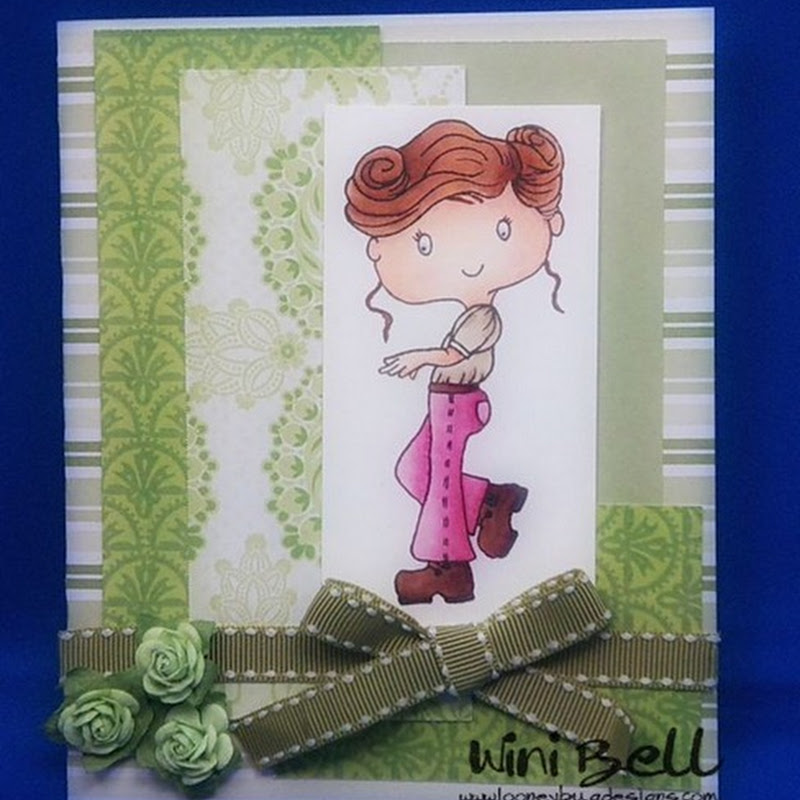
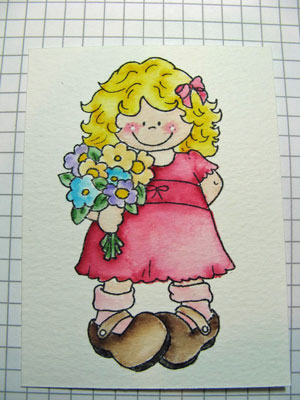
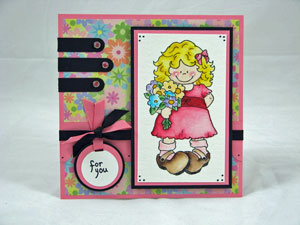
A traditionally hand stamped card, nothing fancy, just quick and easy...So you see you can clean and simple, or over the top fancy,depending on the amount of M&M's and coffee..lol


The card is also very basic, and easy and yet it combines a lot of the techniques, stamping and embossing, paper piecings, inking, chalking, and all done with pop dots for a 3-D look...The items were cut from the Sizzix library of dies, and a few free habd pieces as well....This card was a gift.
Have a great day
Inky

Saturday, August 15, 2009

hAPPY sATURDAY CHAlLeNgE

hELLO Crafty ones...It was awesome to see so many of you come to the market, and collect your freebies! And happy to say there are 4 more ladies to add to the craft madness, and they will fit in perfectly with out little group!!!SO I been thinking....which is dangerous all in itself,lol but none the less I was doing it...SO how about a challenge for saturdays???? I will post a challenge on Monday, you complete the challenge bring it to the market, I take a photo of it, you collect your freebie, and I post all your creations to the blog here for all to see...SO lets try something easy to start with....This is actually an idea from Judy and Jean who stopped at the market....

Ready?????

Make a card using the colors orange, blue, green(any shades of those colors)and some ribbon and it must be embellished at least 3 times...SO lets see your works of art....And I too will play along and make one...Will post it on the blog, and the winner gets a extra special surprise...So put your thinking caps on, break out the colors listed above and create a work of art...

Friday, August 14, 2009

Paper Piecing, gotta love it!!!!

The Easter Train was cut from Sizzix dies(train/grass/eggs/chick) they were layered, inked and stickles were even used.
This page element is a paper piecing pattern purchased from Precious Piecings her patterns are great, there are many pieces and layers making them look realistic, and oh so cute...
This Teddy Bear pattern has much less pieces, and still very cute.
The baby bib is a .gsd file I got from a friend...All these particular patterns i cut from digital cutter, the Silhouette, I am in love with my machine and could never live without it, the baby page element below was cut on the big cricut using the "New Arrival Cartridge", and a tear bear.
Tear bears can be cut from card stock, mulberry papers, or handmade papers, and even some fake furs.

Hello crafty ones. In case some of you do not now this about me, I am gonna spill the beans, I love, love, love paper piecings of all kinds. They are fun to design, create, and play around with, take something 1 dimensional, and turn it into a 3-D work of art. Its very easy, and very addicting. Weather your style be the tear animals, or people, or taking die cuts and transforming them. Once you start you will not be able to start. There are a few good places to purchase the patterns, most of these places give you many options when downloading the files, they usually include 1. a cut pattern, where you print it on your computer, cut out the pieces to make templates then just trace cut, color/ink/chalk, and glue...then theres 2. print and cut, where you print from printer onto cardstock, cut the pieces and glue, all the coloring and shading is already finished for you, and then theres 3.GSD files, that open and cut with your craft robo/Silhouette software, you open the file, resize it if needed, and hit the cut button the pieces cut perfectly, then you just need to color/ink/chalk and glue them together. then there's 4. a .svg file, inkscape opens this file, then depending on your machine import the file as a . dxf to your desktop cutter(Craft robo, Silhouette, wishblade) hit cut and again it appears. 5. theres also files called AI(adobe illustrator) EPS(encapsulated post script) KNK(for pazzles cutter) 6. the old fashion way, find an image from a coloring book, make your templates in layers and create something amazing... 7. .scut file is a file that is opened in a program called SCAL, and it works with your cricut, giving much of the same freedom that other cutters allow. No matter what file you need it's there just waiting for you do it. It sounds a lot harder than it really is.. SO for some files to print and cut by hand, come see me at the market..... The inkscape program is a free program and is capable of amazing things, so download it and give it a whirl...And come get your free pattern on Saturday Hugs, Inky

Thursday, August 13, 2009

Stamping basics...

Hello ladies, well as today is stamping day, I thought I should first give you some basic info on inks and ink pad uses.

here are a few tips you can apply, no matter what type of ink is in a pad you are considering buying: First, buy ink pads whose inking surface is NOT flush with the plastic casing. You will want *raised* ink pads, meaning that the inking surface will be elevated from the plastic base. The reason for this is when you are working with a stamp larger than the inking surface, you will not be able to completely ink up the surface with a piece of plastic casing in the way. If your inking surface is raised, you can move the stamp about freely, or place the stamp face up on your table and "stamp" the inkpad all around the rubber surface of your image to ink it up. In the event of this scenario, it would also behoove you to have an inkpad with a removable lid. Remember also that just because the inkpad is hinged, does not necessarily mean that the lid is not removable. The inkpads I own are an example of this case--the tops easily pop off with a slight squeeze of the lid. I feel I get the best of two worlds with this type of inkpad. On the one hand, because of the hinged lid, my lid is not going to fall off if I toss it in a drawer, it won't get buried under my paper piles as I am stamping and it won't get ink on the lid when trying to put it back on straight (which inevitably smears on my fingers and on my cards). On the other hand, with the removable aspect of the hinged lid, if I feel the lid is in my way, it is easily removed and then snapped back into place. The second major criteria for me when purchasing ink pads is that the pad should be re-inkable because I don't want to have to buy a new stamp pad every time that particular color gets a bit dry.

Inkpads can come in one single color, or they can have a variety of colors in the same pad. The latter is usually referred to as a "rainbow" pad, although the color scheme used may be very different from that found in a rainbow. With that said, let's take a foray into some specific types of inks used in ink pads...


DYE INKS (WATERBASED)

(Stampin’ Up! Classic Ink Pads are an example of dye inkpads ~

EXCEPT Black! Marvy Matchables are also waterbased dye ink)

This will probably be the type of ink in the first stamping pads you will use. It is general purpose ink for stamping on paper. Dye inkpads come in a variety of sizes, as well as inking surfaces--including felt, linen and sponge. This waterbased dye ink may be used on most any type of paper and, most conveniently, has a very quick drying time. The nature of the dye inks is such that they soak in and stain the fibers of the paper. Many of these inks are manufactured to be acid-free, but do tend to fade with time and especially sunlight if your stamped item is not treated with a special UV fixative to help impede that process. They also may run if in contact with water or used in conjunction with water based mediums such as markers to fill in detail areas. These may be important considerations to keep in mind if your rubber stamp art is mainly going to be expressed in scrapbooking.

If you are looking for a waterbased dye ink rainbow pad, I suggest you purchase one with the newest technology, meaning a case that actually separates the individual colors of ink on their own small ink pad (Kalidacolor pads and Stampin’ Up! Spectrum pads have this type of inkpad). These pads are simply pushed together with the flip of a button to use for a graduated color effect in stamping. The lids of these pads will not close unless that special button separating the individual inkpads has been engaged. This means that while you are storing your rainbow inkpad, the colors will not intermingle and become "muddy". It also means that you can re-ink each separate color as necessary. And, it also means that you in fact have a number of small stamp pads in one because if you separate the individual inkpads you can ink up a small stamp with a single color. They're pretty cool.

Waterbased dye inks are easily cleaned from your stamps with water. Some stampers like to use damp paper towels or baby wipes to dab the ink off.

WATERPROOF INK PADS (DYE-BASED)

(Stampin’ Up!’s Black inkpad is an example of dye-based waterproof ink, so are the Memories inkpads)

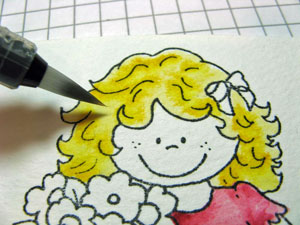
This type of ink is dye-based, unlike the inks described above. Because of this feature, these inks, once dry, will not run with water. Some of these inks are also manufactured acid-free and may be preferred for their waterproof quality in scrapbooking. This type of inkpad is especially helpful in conjunction with particular stamping techniques. Two, which come to my mind, are watercoloring or coloring in an outline type of image with waterbased markers. Hence, you may see these labeled as a "watercolor ink pad" or an "outliner" pad. In either case, an image may be stamped down, allowed to dry, then may be worked over with watercolors or waterbased markers to color in detail--without smudging the originally stamped image. I find I only need one of these watercolor-type pads myself, and it is the black one. Some disclaimers: I have heard differing accounts of this type of ink turning to an off-color when in contact with certain glossy papers, or with cold laminate adhesive. Also, on some coated or glossy papers, the waterproof ink doesn't seem to dry completely, even if heated air is applied, and will smudge either when touched or in contact with moisture, as from waterbased markers. Keep those things in mind and experiment with paper types and adhesives used when working with your waterproof inkpads, especially before replicating an item in quantity. A final note...because of the dye-based waterproof qualities of this type of ink, it is more difficult to clean off of your stamps. A solvent based cleaner is needed to most successfully remove this ink from the rubber. AND, although the ink is "waterproof", it is NOT classified as permanent and is not suitable for certain applications such as fabric stamping or stamping on shrink plastic.

PIGMENT INK PADS

(Stampin’ Up!’s Craft Ink Pads, Colorbox, Brilliance, Inkcredible, Encore and VersaMark are examples of this type of ink)

This type of ink is suitable in a variety of stamping situations. Pigment ink is thicker than a water-based or dye-based ink and is best distributed from a spongy pad. When pigment ink is stamped on a surface, it does not soak in and stain, but rather dries on top of that surface. If you stamp on regular non-coated paper with pigment ink, it will take a little more time to dry than the previously discussed inks, but the color will also remain on the surface, appearing more vibrant. Some stampers like to use a heat gun to thoroughly dry pigment ink stamped image on non-coated paper and watercolor over that since it will not smear. On coated or glossy paper, however, pigment ink does NOT dry. I don't know the precise mechanics of this, but just remember that pigment ink, plus a glossy or coated surface, equals ink that will never dry. "But what if you wait overnight?" you ask..."What if I wait a month???"...you inquire...forget it. Stampers have tried it. But here is the really great side of this unique factor: if you have an ink that will remain wet, you can apply special powders to the ink, which, when heat activated will provide an adhesive and drying quality to the ink--the most popular of these powders is embossing powder. Embossing is so big it is a topic all its own...so let me know if you need more information on that.

Rainbow pads are also available in pigment inks, and since the ink is so thick, the colors will not mix and muddy when stored in contact like the dye ink rainbow pads. There are even pigment rainbow pads whose container is made so that each individual color will actually snap out so that you may use it alone, or, you can rearrange the colors in the container to represent a different graduation of colors. Because of the thickness of pigment ink, it is a little bit more difficult to clean it off your stamps, but it does come off with water. You may, however, want to use a toothbrush or a stamp cleaning pad for ease in cleaning the crevices.

EMBOSSING PADS (Any pigment ink or embossing ink)

These pads are made like the pigment pads, but come in clear or tinted (either faint blush or very pale blue) "ink". They are obviously not used for their own color, but rather just provide that wet base necessary for a medium such as embossing powder to adhere to a surface. The tinted pads are more helpful than the clear pads in seeing where your image has been stamped down. However, there are some special techniques where the clear embossing pad is necessary to create a certain look. If you want more information on these techniques, let me know!

FABRIC & CRAFT INK PADS (Stampin’ Up! Craft Inkpads, Fabrico & ColorBox Crafters Ink are also used for fabrics and other mediums. Considered pigment ink, some must be heat set to become permanent)

These are inks of a pigment ink consistency that may be used for the same things pigment inkpads and embossing pads are used for, but they have an added bonus. When heated, these inks become permanent. This is especially useful for fabric and wood stamping. A special feature you can take advantage of when fabric stamping with these craft inks is that if you make a mistake you can't stand, you may launder your item if it has not yet been heat set and that will remove the ink!

PERMANENT INKS (These are solvent based inks and need a special cleaner. Examples are Staz-On, Zim Ink, Décor-it, 123 Ink & Feista. Permanent on wood, walls, plastic, shrink plastic, glass, metal & paper)

These inks are considered permanent once dry, and do not require a heat setting. They will definitely stain your stamps, and can be hard to clean off even with a solvent cleaner.

STORING INK PADS

I suggest storing your inkpads upside down so that when you want to use them, the ink will have sunk to the top of the pad and you will have a nice wet surface for inking up your stamp. Because of this storage method, I index the bottom of my inkpads if the original packaging has not done that already. I like to run out return address size labels with the name of the color, and stamp a small image in that color ink on another label to place below the name. This way I can dig through my inkpads while they are upside down, looking either by color name or the shade on the sticker to choose the one I want to work with.

Some folks store their inkpads in a shoebox, some in plastic containers or drawers--but a really neat idea is to store them on the wall in a cassette tape storage unit. You can stamp a small dot next to each inkpad's slot (with the eraser of a pencil) to show the color and perhaps use a fine tip permanent marker to write the name of the color on the side of the inkpad's case that faces out. This will help free up your precious desk space for other stamping supplies!

USING YOUR INK PADS

I bet you thought I'd never get to this part! Well, using the inkpads is really the easiest part. First, always make sure your stamp is clean before you ink it up or you may end up with a new shade to an inkpad. It is also important to get any fuzz, fluff, strings, glitter, etc. off the stamp, as these will ink up right along with the rubber of your stamp and leave unsightly traces or blank spots on your stamped image. To thoroughly ink up an image, I first twist my stamp on my inkpad about 3 times, then tap my stamp on the inkpad about 3 times. Then, LOOK at the rubber image. Even if you are using a light shade of ink, you should still be able to see the moisture of the ink covering the surface of the image. If the image is not thoroughly inked, just repeat the twists and the taps until it is. Place your inked stamp straight down on a piece of paper, push down on the top of the stamp to ensure that all of the rubber image has made contact with the paper, then lift straight up. Remember to clean your stamp before inking it up in a new color. Now, go stamp, scrap, alter & create up a storm!


Wednesday, August 12, 2009

Wednesday Market and new project day

Hello crafty ones...Well today there a lot of things going on, first of all I will be at Market today just waiting on you ladies who found the code word...Secondly getting up today's project, which is a mini album....So come scream out the word today or Saturday, and get your mini goodie...See ya soon ladies.
Oh and don't forget to visit Shelly the stamp ladies blog and Stampin Up store, found here..............
Have a craft happy day
Inky

Tuesday, August 11, 2009

Technique Tuesday...

Hello ladies, so those of you who collected your items from me at the market, are probally wondering what to do with them.. Well these flowers are perfect for any project you are working on.. First I cut them on my Silhouette digital cutter, ran them through the Sizzix with a variety of Cuttlebug embossing folders, that's it.
So now you can use several different techniques to color them..
First you can do direct to paper...By taking 1 or 2 colors of ink pads that match the project you are working on, as light or as dark as you wish, rub the ink pad over the flowers untill the desired pattern and color intensity are what you want. You may ink either side, as each will give you a totally different look.
OR
For a softer more subtle look, pull out your baby wipes and your ink pads. Ink up your baby wipe and wipe it across the pieces you want color on.
OR
Distress just the edges, using Distress pads.
****Remember, it is best to use dye based inks for this project as dye based ink pads dry quickly and do not smear where pigment inks need to set longer, or be heat set. These inks are best suited for embossing powders..
Pics coming soon, batteries dead on camera, sorry

Monday, August 10, 2009

Mondays new card day


Well, on Monday's my goal is to show you uniquely shaped and functional cards. These cards are a lot of fun to make, and you can use any theme. They are easy to make, and cut since they are all straight lines, so all you need is paper, and xacto blade, a ruler, and of course paper and embellies, a bone folder works great when creasing the pop up elements, so have fun with it...

Sunday, August 9, 2009

This weeks magic word

So, this was quite an interesting week, very busy with setting up 3 of 7 days, and trying to get everything done...But I did it...ANd am looking forward to this weeks challenges...The ladies that came and picked up there goodies from me, keep an eye on the blog cause on Tuesday for the Technique day I will be showing you what to do, and how to use them. SO many options, so many uses, and they are for scrappers, stampers, and card makers. SO stay tuned...ALso this weeks wacky word to collect your free gifts, is (willy wonka), so remember come to my booth and yell out the word and get the next round of surprises. Have a craft happy day everyone...And dont forget spread the word and sign up on the blog to be a follower and have your name put into a drawing for a great gift basket..See ya soon

Sunday Free file day


Hello crafty ones....Well being that its file freebie, the files can be SVG,DXF, GSD, SCUT, or printable. SCUT is for your cricut owners with the SCAL software, SVG, DXF is a file created in and formatted in INKSCAPE a free program that allows you to convert those files allowing you to cut them in your Silhouette, Craft Robo, KNK, Pazzles, Wishblade, and other vector related machines. Inkscape is an awesome program to learn to use, there are millions of possibilities, and just plain old an awesome program. SO you ladies should let me know what machines if any you have so I know files extensions to share with you. SO for today we will do a printable version.

So this template is from Mirkwood designs, and is a cute lil BonBon box, perfect for those special lil trinkets...To use

Note: Please make sure your printing margins are set to .5 inches (half an inch) or the template will not print completely. In your browser's Menu bar, select File > Page Setup, and change the margin settings to .5. (The selections may be slightly different between browsers.)

This template makes a box whose sides fold over and interlock in a three-dimensional design (sort of like the petals of a rose). The finished box is 2.5 x 2.5 and about 1 inch high inside. Remember, though, that you can alter the template to suit your needs!

  1. Print the template and trace onto card stock.

  2. Decorate both sides as desired.

  3. Fold on all dotted lines.

  4. Fold sides in toward center, overlapping as you go. Fold the last side under the first.

This box is perfect for holding a couple of bon bons or a small trinket!

Saturday, August 8, 2009

Altered Arts Day


Altered Arts is my favorite thing to do. You can incorporate stamping, scrapping, painting, use bling, , little bits and bobs are welcome, so what better way to satisfy your need for paper, stamps, inks, bling, paints, and chockets. With Altered Arts of course...My favorite, well one of my favorite places to shop for altered art supplies is http://www.b-muse.com/ as well as others. But this place for a buck is awesome....
Altered Art refers to the process of using every day objects in combinations that create unusual and often textural and dimensional works of art. Incorporating objects into books, boxes, tins or collage work are just some examples
I love to alter cans, tins of all sizes, old books, journals, microscope slides, dominos, glass blocks, canvas's, cooking supplies, postcards, ATC's, game pieces, inchies and serendipity aquares are fun, fast and easy to make and have hundreds of uses. Clock and watch parts, mini vials, ball chains, zipper pulls, and oh the mini domino books, and bracelets, and the possibilities are endless, oh my am I wanting to get my items out and create... Any way this week's focus in Dominos...
Supplies Needed

There are many ways to color the Dominos, Alcohol INks, Adirondak markers and Dimensional Paints, Luminere Paints, Sharpies, Archival Inks, Stazon Inks, Posh accents gold pen, or painty pens. ALso needed is embossing powders, stamps, embellies and findings to match.
If making a necklace, or key chain a drill or Dremel tool is also needed. The actual key ring parts, and beads to match for a necklace.
SO have fun, and step out side the box a bit....Tutorials coming soon...Have a craft happy day
Inky, aka Ronnie


Thursday, August 6, 2009

Friday, Maxwell Street Day


Hello ladies, The summer event for kids every where is on Friday Aug 6th. That's tomorrow. I never remember it raining on a Maxwell street day, but they are forecasting it for us. If it does not rain, ( pouring down) I will be there set up, just waiting for everyone to come collect their prizes, that was due them last week. This time I am not relying on my friend, this way she can not blow me off. I am still so very upset about that. I could not believe she did that to me, and on purpose yet.
SO anywho, if its not pouring rain I plan on being there. The entire main street market is scheduled to be there setup. Starts at 8am, with the ball drop at 2/3 pm, so I am told.
Come He** or high water I will also be there on Saturday, in my scheduled spot and my normal time 8am-1pm. SO grab your code words and any challenges you have done to redeem your prizes.
See you all soon. Have a great day

Wednesday, August 5, 2009

Wednesday card day


Well as you can see I have my days mixed up...lol what a week it has been.
This is a very simple card to make and takes very little time to do.
A sponge, baby wipes or daubers and ink pads in 2 blues for the background. Or chalks and cotton balls, The chalks give it a softer look. Pounce your background till it is what you want, then stamp your images, add a bow, and sentiment and you are ready to send this off. Took 15 minutes. Fast and easy when you need that quick card.

Techniuue Tuesday


Dry De-bossing Techniques
Supplies
  • Light table (or window)

  • Brass template

  • Stylus tool

  • Wax paper

  • Cardstock

  • Background stamp

  • Brayer (optional)

  • Dye Ink (darker than your cardstock color)

Step-by-Step

Step 1

Start by rubbing wax paper over your cardstock. This step makes the stylus tool glide easier over the paper.


Step 2

Turn your light table on and place the brass template on the surface of the table.

Lay your cardstock over the template and start tracing the open areas of your template with your stylus.

Hint: if you don't have a light table, tape your template to a window and hold your cardstock over the template

Step 3

Add more images as desired

Step 4

Ink up your background stamp. I always use the brayer to help me get an even coverage.

Step 5

With the raised images facing down, stamp the background stamp over it. The ink won't stay on your debossed image, leaving it the same color as the cardstock.

Step 6

Finish your project.

Saturday, August 1, 2009

Sunday Free File Day


Well, I hope you all are having a great weekend, and I am so mad yet that my friend stood me up on saturday. The last thing I wanted to do was not be at the market for you all, but on the upside, you will all have untill this weekend to do the challenges and find code words to claim your prizes..
Amyway for the first file I wanted it to be something that everyone would get use out of. So after thinking about it and looking through hundreds of files I think I found a winner.
***************************************************************************************

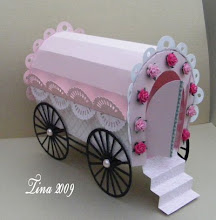
Card Portfolio Template

If you make a card with a lot of embellishments which you don't want smashed into a flat envelope, this gusseted Card Portfolio is for you! It will also hold about six hand-made cards and envelopes—a lovely gift for a loved one! Check out the sample at the bottom of this page.

Tip: Depending on your printer's capabilities, you will probably have to enlarge the template by hand or using a copier. I designed it for cards that are one-quarter of a standard (8.5 x 11) sheet of paper, but it is easy to reduce or enlarge the template for any size card. Simply make the two large rectangles the measurement of your card (or envelope), plus 1/8 inch on each side. Widen the flap accordingly. The other sides (gussets) should stay the same width.

Design idea: Cut Card Portfolio out of freezer paper, and iron your favorite fancy napkin or tissue wrapping paper to the shiny side. (Make sure that you are using only one ply of the napkin!) Use this as the inside of the portfolio—decorate the outside with lovely stamped images and a nice ribbon. It will make a lovely presentation for your beautiful art cards!

So what is altered art you ask...


Well Altered Arts can be just about anything. In my world, Altered Art is me adding an object to another object, it's that simple. Let me explain. I am huge fan of the world of Altered Arts, Collage, ZNE,Zetti, Mixed Media, ATC's, books, journals, game pieces, raffle tickets, buttons, safety pins,match books, altoid tins, lunch pails, glass jars, boxes of all shapes and sizes and even clothes pins. The list is endless, and this is my favorite thing to do. SO I am hoping you all are going to love this as much as I do.
Here are some links to my all time favorite sites, and pics of pieces I have done, and friends of mine have done, I hope you all enjoy the awesome eye candy.
And by the way, we are going to be making some of these things..YAY...
So, the basic items needed for an altered project is, papers of all patterns, ribbons, glue sticks, buttons and other embellies. A bit of imagination, and the ability to have fun...